protected final void processRequest(HttpServletRequest request, HttpServletResponse response) throws ServletException, IOException { //开始时间 long startTime = System.currentTimeMillis(); //报错 Throwable failureCause = null; //这里的语言采用的TreadLocal存储,这里拿到项目设置的语言 LocaleContext previousLocaleContext = LocaleContextHolder.getLocaleContext(); //拿到请求中携带的语言 LocaleContext localeContext = this.buildLocaleContext(request); //这里通过threadLocal存储的ServletRequestAttributes RequestAttributes previousAttributes = RequestContextHolder.getRequestAttributes(); //这里获取ServletRequest ServletRequestAttributes requestAttributes = this.buildRequestAttributes(request, response, previousAttributes); //异步管理,处理是否使用异步,并将自己注入到request中 WebAsyncManager asyncManager = WebAsyncUtils.getAsyncManager(request); //这里注册了FramworkSerlvet的类,但是并没有执行哦 asyncManager.registerCallableInterceptor(FrameworkServlet.class.getName(), new FrameworkServlet.RequestBindingInterceptor()); //这里做了一些处理,主要是往ThreadLocal中设置值 this.initContextHolders(request, localeContext, requestAttributes); try { //真正的处理请求 this.doService(request, response); } catch (IOException | ServletException var16) { failureCause = var16; throw var16; } catch (Throwable var17) { failureCause = var17; throw new NestedServletException("Request processing failed", var17); } finally { //清除threadlocal中数据 this.resetContextHolders(request, previousLocaleContext, previousAttributes); if (requestAttributes != null) { requestAttributes.requestCompleted(); } //日志相关,debug开启 this.logResult(request, response, (Throwable)failureCause, asyncManager); //请求事件广播 this.publishRequestHandledEvent(request, response, startTime, (Throwable)failureCause); }}
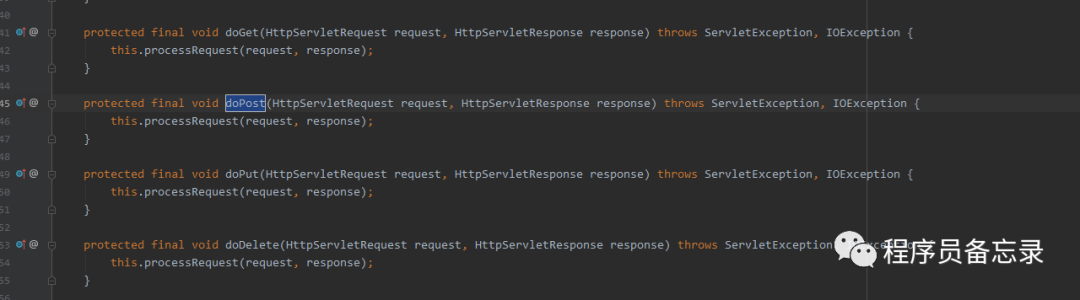
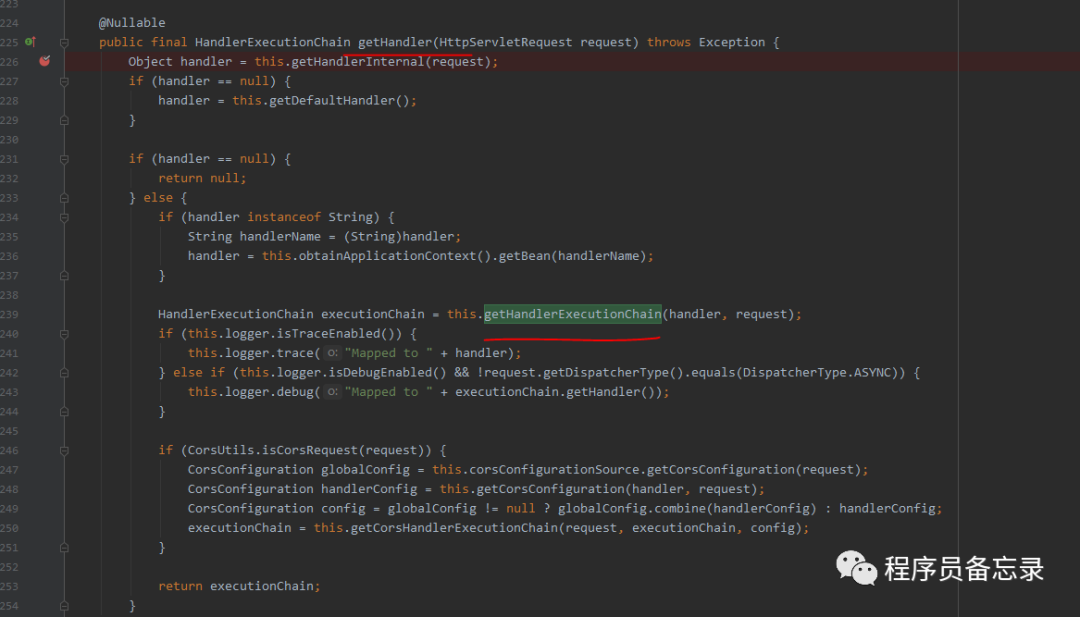
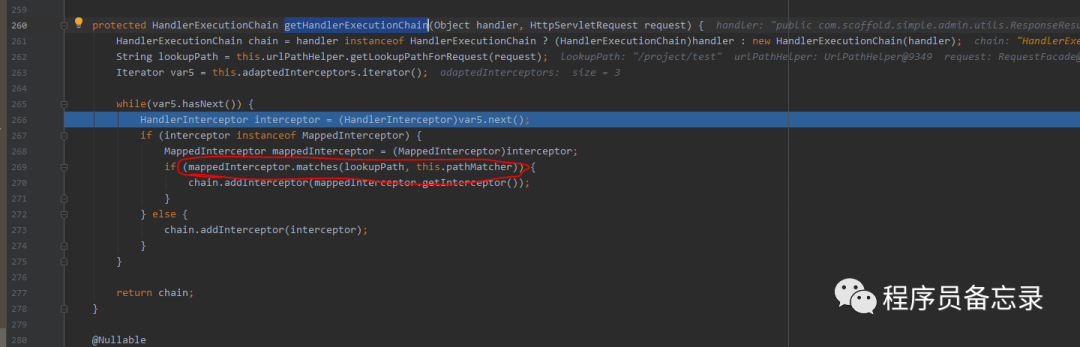
protected void doService(HttpServletRequest request, HttpServletResponse response) throws Exception { //格式化打印日志 this.logRequest(request); Map attributesSnapshot = null; if (WebUtils.isIncludeRequest(request)) { attributesSnapshot = new HashMap(); Enumeration attrNames = request.getAttributeNames(); label95: while(true) { String attrName; do { if (!attrNames.hasMoreElements()) { break label95; } attrName = (String)attrNames.nextElement(); } while(!this.cleanupAfterInclude && !attrName.startsWith("org.springframework.web.servlet")); attributesSnapshot.put(attrName, request.getAttribute(attrName)); } } //将SpringMVC的组件设置到request中 request.setAttribute(WEB_APPLICATION_CONTEXT_ATTRIBUTE, this.getWebApplicationContext()); request.setAttribute(LOCALE_RESOLVER_ATTRIBUTE, this.localeResolver); request.setAttribute(THEME_RESOLVER_ATTRIBUTE, this.themeResolver); request.setAttribute(THEME_SOURCE_ATTRIBUTE, this.getThemeSource()); if (this.flashMapManager != null) { FlashMap inputFlashMap = this.flashMapManager.retrieveAndUpdate(request, response); if (inputFlashMap != null) { request.setAttribute(INPUT_FLASH_MAP_ATTRIBUTE, Collections.unmodifiableMap(inputFlashMap)); } request.setAttribute(OUTPUT_FLASH_MAP_ATTRIBUTE, new FlashMap()); request.setAttribute(FLASH_MAP_MANAGER_ATTRIBUTE, this.flashMapManager); } try { //真实的数据处理 this.doDispatch(request, response); } finally { //拿到attribute中异步处理器实体判断是否要执行了。 if (!WebAsyncUtils.getAsyncManager(request).isConcurrentHandlingStarted() && attributesSnapshot != null) { this.restoreAttributesAfterInclude(request, attributesSnapshot); } }}//看样子这里是真正搞事情的地方protected void doDispatch(HttpServletRequest request, HttpServletResponse response) throws Exception { HttpServletRequest processedRequest = request; //这个应该就是控制器了 HandlerExecutionChain mappedHandler = null; boolean multipartRequestParsed = false; //先亮出异步调用管理器的法器 WebAsyncManager asyncManager = WebAsyncUtils.getAsyncManager(request); try { try { //拿到视图 ModelAndView mv = null; Object dispatchException = null; try { //检查是否为文件上传 processedRequest = this.checkMultipart(request); //判断会否发生了变化 multipartRequestParsed = processedRequest != request; //获取与之相应的控制器 mappedHandler = this.getHandler(processedRequest); if (mappedHandler == null) { this.noHandlerFound(processedRequest, response); return; } //传入所有的handler,然后通过适配器进行校验。然后返回第一个合适的handler HandlerAdapter ha = this.getHandlerAdapter(mappedHandler.getHandler()); String method = request.getMethod(); boolean isGet = "GET".equals(method); if (isGet || "HEAD".equals(method)) { long lastModified = ha.getLastModified(request, mappedHandler.getHandler()); if ((new ServletWebRequest(request, response)).checkNotModified(lastModified) && isGet) { return; } } //执行拦截器 if (!mappedHandler.applyPreHandle(processedRequest, response)) { return; } //执行控制器 mv = ha.handle(processedRequest, response, mappedHandler.getHandler()); if (asyncManager.isConcurrentHandlingStarted()) { return; } //处理请求返回一个页面的问题 this.applyDefaultViewName(processedRequest, mv); mappedHandler.applyPostHandle(processedRequest, response, mv); } catch (Exception var20) { dispatchException = var20; } catch (Throwable var21) { dispatchException = new NestedServletException("Handler dispatch failed", var21); } //视图解析等 this.processDispatchResult(processedRequest, response, mappedHandler, mv, (Exception)dispatchException); } catch (Exception var22) { this.triggerAfterCompletion(processedRequest, response, mappedHandler, var22); } catch (Throwable var23) { this.triggerAfterCompletion(processedRequest, response, mappedHandler, new NestedServletException("Handler processing failed", var23)); } } finally { if (asyncManager.isConcurrentHandlingStarted()) { if (mappedHandler != null) { mappedHandler.applyAfterConcurrentHandlingStarted(processedRequest, response); } } else if (multipartRequestParsed) { this.cleanupMultipart(processedRequest); } }}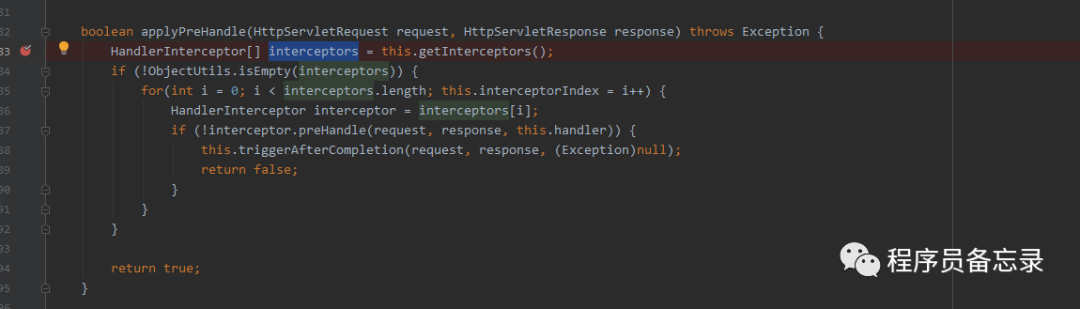

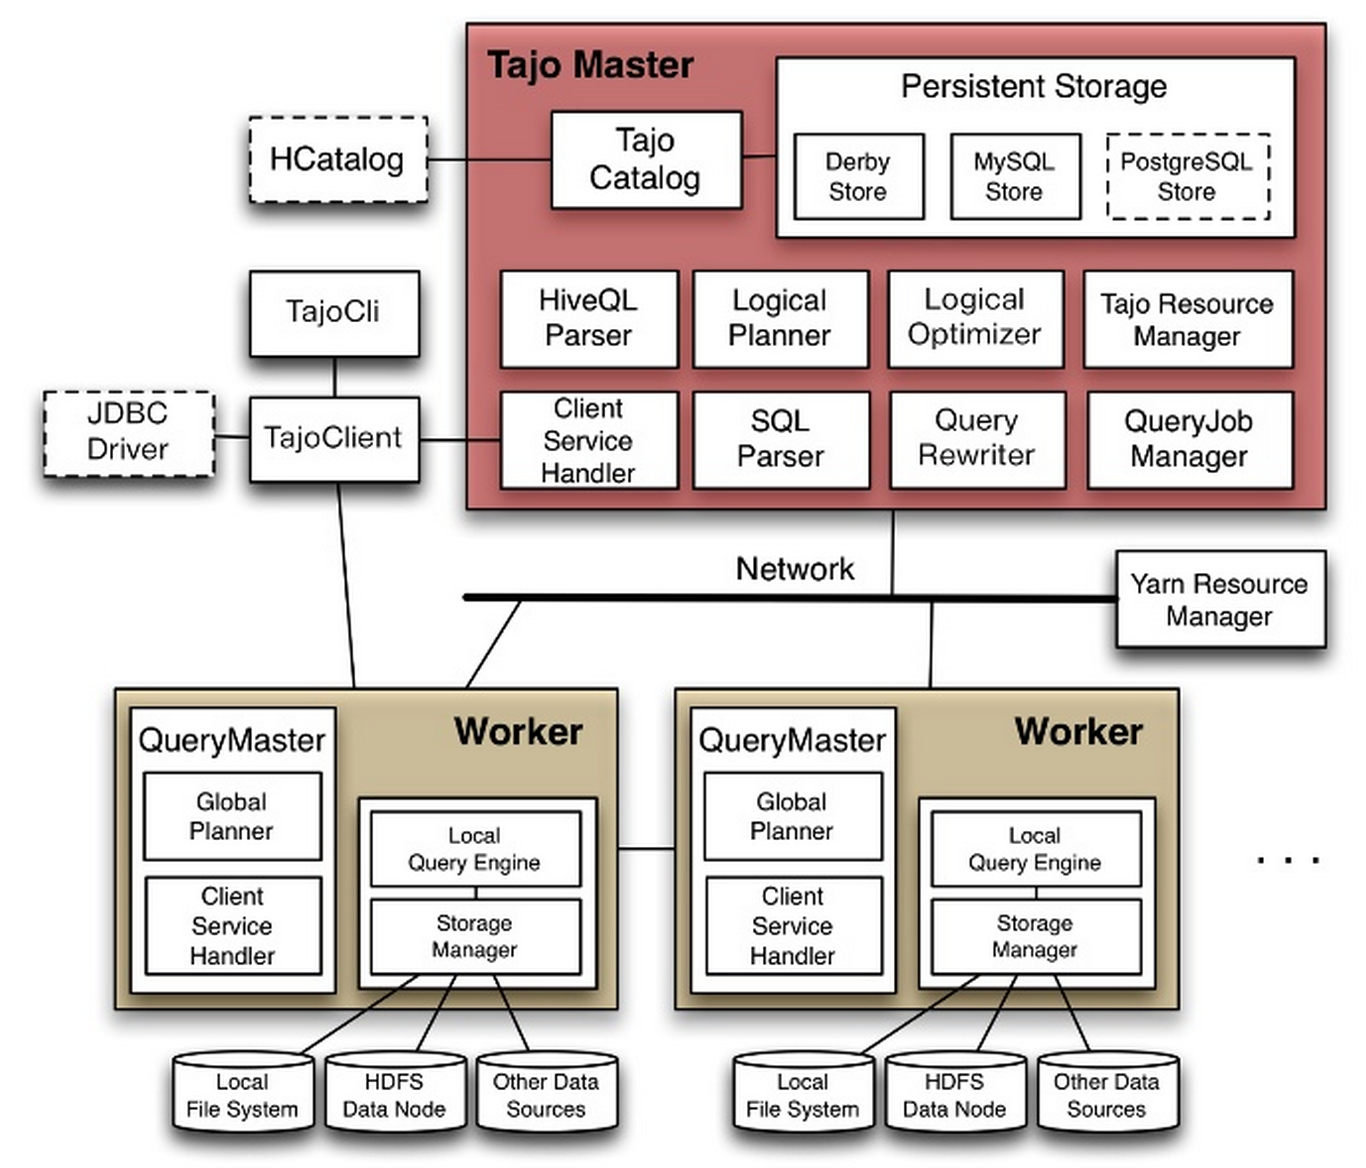
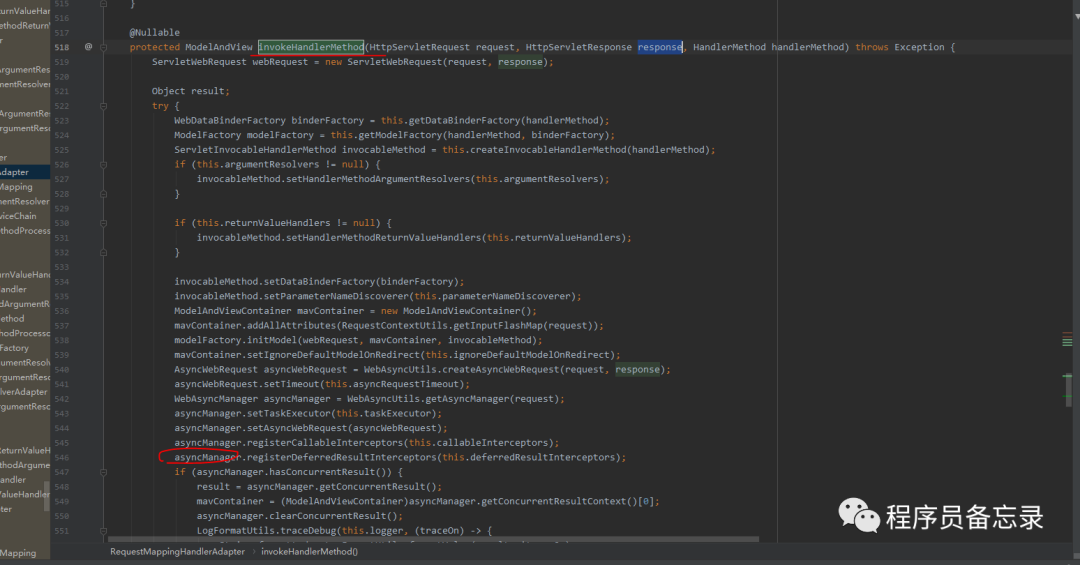
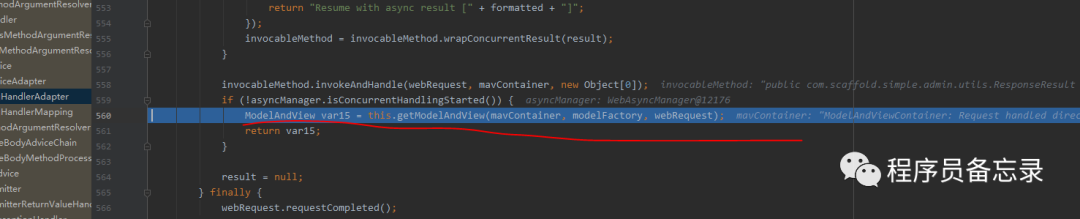
protected ModelAndView handleInternal(HttpServletRequest request, HttpServletResponse response, HandlerMethod handlerMethod) throws Exception { //检测方法是否支持 this.checkRequest(request); ModelAndView mav; //这里是否让session加锁 if (this.synchronizeOnSession) { //通过jsessionId获取session HttpSession session = request.getSession(false); if (session != null) { //拿到自己的session,然后加锁。防止一个人高并发的发送接口。加在这里也有一个好处就是 //如果一个用户大量发送接口也不会让请求进入,会在这里加锁。 Object mutex = WebUtils.getSessionMutex(session); synchronized(mutex) { //具体执行代码 mav = this.invokeHandlerMethod(request, response, handlerMethod); } } else { //如果没有session的话就 执行这个。 mav = this.invokeHandlerMethod(request, response, handlerMethod); } } else { //如果添加了是异步的获取session的话就调这个 mav = this.invokeHandlerMethod(request, response, handlerMethod); } //看看是否有缓冲设置 if (!response.containsHeader("Cache-Control")) { //设置缓存的过期时间这些 if (this.getSessionAttributesHandler(handlerMethod).hasSessionAttributes()) { this.applyCacheSeconds(response, this.cacheSecondsForSessionAttributeHandlers); } else { this.prepareResponse(response); } } return mav; }在具体执行的时候,我们发现了线程管理器的踪迹。那么这个线程管理器到底干了什么?通过逐步跟踪发现并没有执行。可能我们目前对SpringMVC的使用还比较浅显吧。所以目前还没有发现。我们后期再看这个问题。


版权声明:本站所有资料均为网友推荐收集整理而来,仅供学习和研究交流使用。

工作时间:8:00-18:00
客服电话
电子邮件
admin@qq.com
扫码二维码
获取最新动态