技術背景
如今微服務架構盛行,在分布式系統中,項目日益龐大,子項目日益增多,每個項目都散落著各種配置文件,且隨著服務的增加而不斷增多。此時,往往某一個基礎服務信息變更,都會導致一系列服務的更新和重啟,運維也是苦不堪言,而且還很容易出錯。于是,配置中心便由此應運而生了。
目前市面上開源的配置中心有很多,像Spring家族的Spring Cloud Config, Apache的Apache Commons Configuration,淘寶的diamond,?百度的disconf,?360的QConf等等,都是為了解決這類問題。當下Spring體系大行其道,我們當然也優先選擇Spring Cloud Config了。
Spring Cloud Config
Spring Cloud Config 是一套為分布式系統中的基礎設施和微服務應用提供集中化配置的管理方案,它分為服務端與客戶端兩個部分。服務端也稱為分布式配置中心,它是一個獨立的微服務應用,用來連接配置倉庫并為客戶端提供獲取配置信息。客戶端則是微服務架構中的各個微服務應用或基礎設施,它們通過指定的配置中心來管理服務相關的配置內容,并在啟動的時候從配置中心獲取和加載配置信息。
Spring Cloud Config對服務端和客戶端中的環境變量和屬性配置?實現了抽象映射,所以它除了適用于 Spring 應用,也是可以在任何其他語言應用中使用的。Spring Cloud Config 實現的配置中心默認采用 Git 來存儲配置信息,所以使用 Spring Cloud Config 構建的配置服務器,天然就支持對微服務應用配置信息的版本管理,并且可以通過 Git 客戶端工具非常方便的管理和訪問配置內容。當然它也提供了對其他存儲方式的支持,比如:SVN 倉庫、本地化文件系統等。
實現案例
準備配置文件
docker 權限??首先在GIT下,新建config-repo目錄,用來存放配置文件,如下圖所示,分別模擬了三個環境的配置文件。
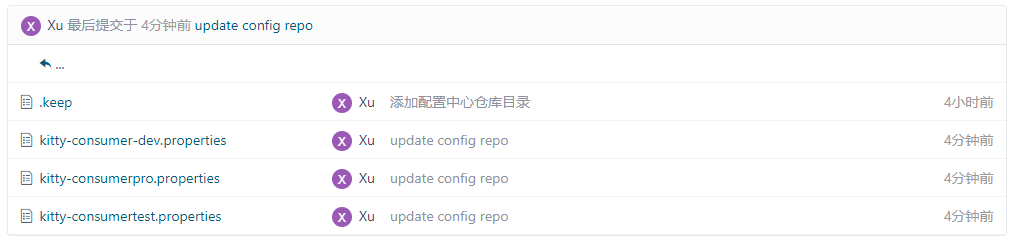
?分別編輯三個文件,配置 comsumer.hello 屬性的值為?comsumer.hello=hello, this is xx configurations.

服務端實現
新建工程
新建 kitty-conifg 工程,作為配置中心的服務端,負責把GIT倉庫的配置文件發布為RESTFul接口。
SpringCloud。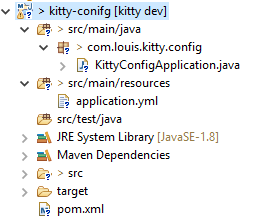
添加依賴
除了Spring Cloud依賴之外,添加配置中心依賴包。
pom.xml

<!--spring config-->
<dependencies><dependency><groupId>org.springframework.cloud</groupId><artifactId>spring-cloud-config-server</artifactId></dependency>
</dependencies>
啟動類
啟動類添加注解 @EnableConfigServer,開啟配置服務支持。
KittyConfigApplication.java
package com.louis.kitty.config;import org.springframework.boot.SpringApplication;
import org.springframework.boot.autoconfigure.SpringBootApplication;
import org.springframework.cloud.client.discovery.EnableDiscoveryClient;
import org.springframework.cloud.config.server.EnableConfigServer;@EnableConfigServer
@EnableDiscoveryClient
@SpringBootApplication
public class KittyConfigApplication {public static void main(String[] args) {SpringApplication.run(KittyConfigApplication.class, args);}
}
配置文件
Spring Framework?修改配置文件,添加如下內容。如果是私有倉庫需要填寫用戶名密碼,如果是公開倉庫,可以不配置密碼。
application.yml
server:port: 8020
spring:application:name: kitty-configcloud:consul:host: localhostport: 8500discovery:serviceName: ${spring.application.name}    # 注冊到consul的服務名稱config:
     label: master? # git倉庫分支server:git:uri: https://gitee.com/liuge1988/kitty.git  # 配置git倉庫的地址search-paths: config-repo  # git倉庫地址下的相對地址,可以配置多個,用,分割。username: username  # git倉庫的賬號password: password  # git倉庫的密碼
Spring Cloud Config也提供本地存儲配置的方式,只需設置屬性spring.profiles.active=native,Config Server會默認從應用的src/main/resource目錄下檢索配置文件。另外也可以通過spring.cloud.config.server.native.searchLocations=file:D:/properties/屬性來指定配置文件的位置。雖然Spring Cloud Config提供了這樣的功能,但是為了更好的支持內容管理和版本控制,還是比較推薦使用GIT的方式。
測試效果
啟動注冊中心,配置中心,訪問?http://localhost:8020/kitty-consumer/dev,返回結果如下。
{"name": "kitty-consumer","profiles": ["dev"],"label": null,"version": "1320259308dfdf438f5963f95cbce9e0a76997b7","state": null,"propertySources": [{"name": "https://gitee.com/liuge1988/kitty.git/config-repo/kitty-consumer-dev.properties","source": {"consumer.hello": "hello, this is dev configurations. "}}]
}
訪問?http://localhost:8020/kitty-consumer/pro,返回結果如下。
{"name": "kitty-consumer","profiles": ["pro"],"label": null,"version": "1320259308dfdf438f5963f95cbce9e0a76997b7","state": null,"propertySources": [{"name": "https://gitee.com/liuge1988/kitty.git/config-repo/kitty-consumer-pro.properties","source": {"consumer.hello": "hello, this is pro configurations. "}}]
}
權限管理怎么實現。上述的返回的信息包含了配置文件的位置、版本、配置文件的名稱以及配置文件中的具體內容,說明server端已經成功獲取了git倉庫的配置信息。
訪問:http://localhost:8020/kitty-consumer-dev.properties,返回結果如下。
?
修改一下dev配置文件內容如下(末尾加了一個 2):
?
權限管理實現原理、再次訪問:http://localhost:8020/kitty-consumer-dev.properties,返回結果如下。
?
發現讀取的是修改后提交的信息,說明服務端會自動讀取最新提交的數據。
倉庫中的配置文件會被轉換成相應的WEB接口,訪問可以參照以下的規則:
- /{application}/{profile}[/{label}]
- /{application}-{profile}.yml
- /{label}/{application}-{profile}.yml
- /{application}-{profile}.properties
- /{label}/{application}-{profile}.properties
以kitty-consumer-dev.properties為例子,它的application是kitty-consumer,profile是dev。client會根據填寫的參數來選擇讀取對應的配置。
客戶端實現
添加依賴
Springboot注解、打開kitty-consumer工程,添加相關依賴。
pom.xml
<!-- spring-cloud-config -->
<dependency><groupId>org.springframework.cloud</groupId><artifactId>spring-cloud-starter-config</artifactId>
</dependency>
配置文件
添加一個bootstrap.yml配置文件,添加配置中心,并把注冊中心的配置移到這里,因為在通過配置中心查找配置時需要通過注冊中心的發現服務。
bootstrap.yml
spring:cloud:consul:host: localhostport: 8500discovery:serviceName: ${spring.application.name} # 注冊到consul的服務名稱config:discovery:enabled: true # 開啟服務發現serviceId: kitty-config # 配置中心服務名稱name: kitty-consumer # 對應{application}部分profile: dev # 對應{profile}部分label: master # 對應git的分支,如果配置中心使用的是本地存儲,則該參數無用 配置說明:
- spring.cloud.config.uri:配置中心的具體地址
- spring.cloud.config.name:對應{application}部分
- spring.cloud.config.profile:對應{profile}部分
- spring.cloud.config.label:對應git的分支。如果配置中心使用的是本地存儲,則該參數無用
- spring.cloud.config.discovery.service-id:指定配置中心的service-id,便于擴展為高可用配置集群。
權限管理方式、特別注意:
上面這些與spring cloud相關的屬性必須配置在bootstrap.yml中,這樣config部分內容才能被正確加載。
因為config的相關配置會先于application.yml,而bootstrap.yml的加載也是先于application.yml文件的。
application.yml
server:port: 8005
spring:application:name: kitty-consumerboot:admin:client:url: "http://localhost:8000"zipkin:base-url: http://localhost:9411/sleuth:sampler:probability: 1 #樣本采集量,默認為0.1,為了測試這里修改為1,正式環境一般使用默認值
# 開放健康檢查接口
management:endpoints:web:exposure:include: "*"endpoint:health:show-details: ALWAYS
#開啟熔斷器
feign:hystrix:enabled: true
控制器
添加一個 SpringConfigController 控制器, 添加注解?@Value("${comsumer.hello}"),聲明hello屬性從配置文件讀取。
權限管理怎么做?SpringConfigController.java
package com.louis.kitty.consumer.controller;
import org.springframework.beans.factory.annotation.Value;
import org.springframework.web.bind.annotation.RequestMapping;
import org.springframework.web.bind.annotation.RestController;@RestController
class SpringConfigController {@Value("${comsumer.hello}")private String hello;@RequestMapping("/hello")public String from() {return this.hello;}
}
測試效果
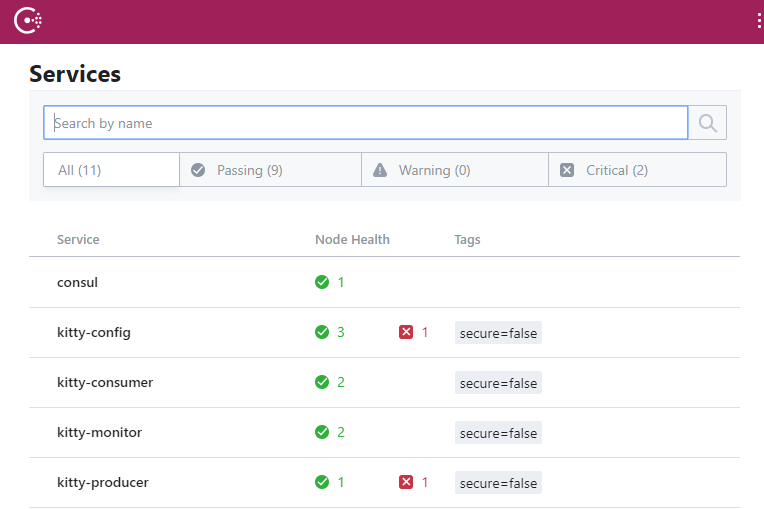
啟動注冊中心、配置中心,訪問:?http://localhost:8500,確認相關服務啟動并注冊。
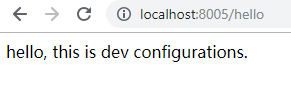
訪問?http://localhost:8005/hello,返回結果。
@SpringBootApplication。說明客戶端已經成功從服務端讀取了配置信息。
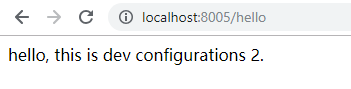
現在手動修改一下倉庫配置文件的內容,移除末尾數字 2,修改完成并提交。

?再次訪問?http://localhost:80052/hello,效果如下。
?
Spring boot。我們發現返回結果并沒有讀取最新提交的內容,這是因為Spring Boot項目只有在啟動的時候才會獲取配置文件的內容,雖然GIT配置信息被修改了,但是客戶端并沒有重新去獲取,所以導致讀取的信息仍然是舊配置。那么該如何去解決這個問題呢?這就是我們下一章要講的 Spring Cloud Bus。
Refresh機制
我們在上面講到,Spring Boot程序只在啟動的時候加載配置文件信息,這樣在GIT倉庫配置修改之后,雖然配置中心服務器能夠讀取最新的提交信息,但是配置中心客戶端卻不會重新讀取,以至于不能及時的讀取更新后的配置信息。這個時候就需要一種通知刷新機制來支持了。
refresh機制是Spring Cloud Config提供的一種刷新機制,它允許客戶端通過POST方法觸發各自的/refresh,只要依賴spring-boot-starter-actuator包就擁有了/refresh的功能,下面我們為我們的客戶端加上刷新功能,以支持更新配置的讀取。
添加依賴
我們的 kitty-consumer 在之前已經添加過actuator依賴,所以這里就不用添加了,如果之前沒有添加需要加上。actuator是健康檢查依賴包,依賴包里攜帶了 /refresh 的功能。
<dependency><groupId>org.springframework.boot</groupId><artifactId>spring-boot-starter-actuator</artifactId>
</dependency>
在使用配置屬性的類型加上 @RefreshScope 注解,這樣在客戶端執行 /refresh 的時候就會刷新此類下面的配置屬性了。
package com.louis.kitty.consumer.controller;
import org.springframework.beans.factory.annotation.Value;
import org.springframework.cloud.context.config.annotation.RefreshScope;
import org.springframework.web.bind.annotation.RequestMapping;
import org.springframework.web.bind.annotation.RestController;@RefreshScope
@RestController
class SpringConfigController {@Value("${consumer.hello}")private String hello;@RequestMapping("/hello")public String from() {return this.hello;}
}
修改配置
用戶權限管理系統、健康檢查接口開放需要在配置文件添加以下內容,開放refresh的相關接口,因為這個我們在之前也配置過了,所以也不需添加了。
management:endpoints:web:exposure:include: "*"
通過上面的接口開放配置,以后以post請求的方式訪問?http://localhost:8005/actuator/refresh?時,就會更新修改后的配置文件了。
特別注意:
這里存在著版本大坑,1.x跟2.x的配置不太一樣,我們用的是2.0+版本,務必注意。
1.安全配置變更
權限管理功能怎么實現?新版本
management.endpoints.web.exposure.include="*"
老版本
management.security.enabled=false
2.訪問地址變更
新版本
http://localhost:8005/actuator/refresh
老版本
http://localhost:8005/refresh
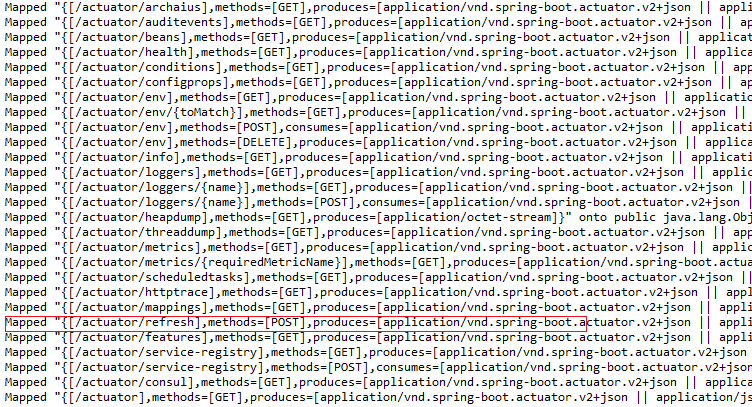
這里還是解釋一下上面這個配置起到了什么具體作用,其實actuator是一個健康檢查包,它提供了一些健康檢查數據接口,refresh功能也是其中的一個接口,但是為了安全起見,它默認只開放了health和info接口(啟動信息會包含如下圖所示信息),而上面的配置就是設置要開放哪些接口, 我們設置成 “*”,是開放所有接口。你也可以指定開發幾個,比如: health,info,refresh,而這里因為我們需要用的refresh功能,所以需要把refresh接口開放出來。

設置成 “*” 后,啟動信息會包含以下信息,而這個叫refresh的post方法,就是我們需要的,上面說的接口地址變更從這里也可以看得出來。
測試效果
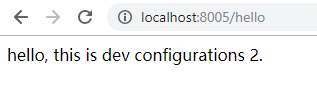
重新啟動服務,訪問?http://localhost:8005/hello,返回結果如下。
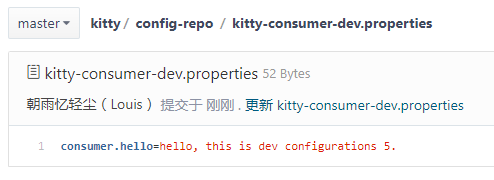
修改倉庫配置內容,末尾加個數字 5,如下圖所示。
再次訪問?http://localhost:8005/hello,如我們所料,結果并沒有更新,因為我們還沒有調refresh方法。
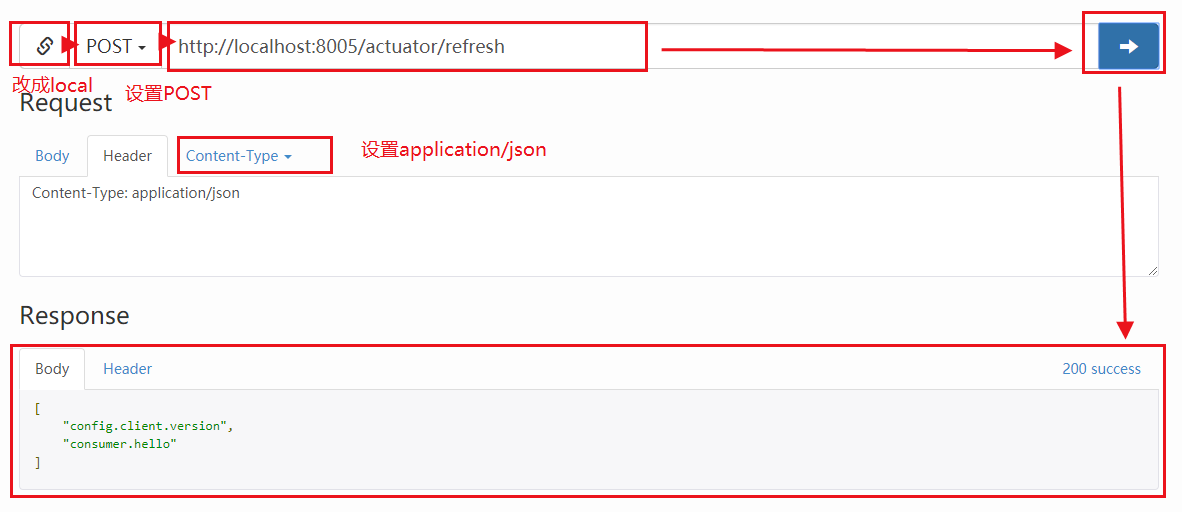
通過工具或自寫代碼發送post請求?http://localhost:8005/actuator/refresh,刷新配置。
這里通過在線測試網站發送,地址:https://getman.cn/Mo2FX?。
注意:先讓你的Chrome支持跨域。設置方法:在快捷方式的target后加上 --disable-web-security --user-data-dir,重啟即可。
刷新之后,再次訪問?http://localhost:8005/hello,返回結果如下。
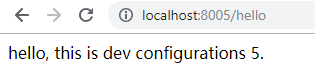
查看返回結果,刷新之后已經可以獲取最新提交的配置內容,但是每次都需要手動刷新客戶端還是很麻煩,如果客戶端數量一多就簡直難以忍受了,有沒有什么比較好的辦法來解決這個問題呢,那是當然的,答案就是:Spring Cloud Bus。
Spring Cloud Bus
Spring Cloud Bus,被大家稱為消息總線,它通過輕量級的消息代理來連接各個分布的節點,可以利用像消息隊列的廣播機制在分布式系統中進行消息傳播,通過消息總線可以實現很多業務功能,其中對于配置中心客戶端刷新,就是一個非常典型的使用場景。
下面這張圖可以很好的解釋消息總線的作用流程(圖片描述來源:純潔的微笑:配置中心博文)。
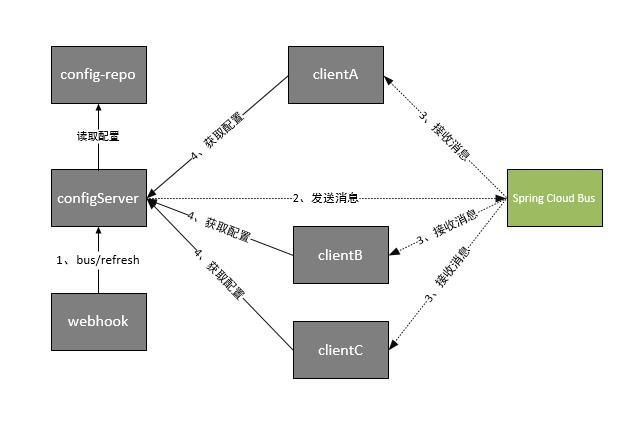
Spring Cloud Bus 進行配置更新步驟如下:
? 1、提交代碼觸發post請求給/actuator/bus-refresh
? 2、server端接收到請求并發送給Spring Cloud Bus
? 3、Spring Cloud bus接到消息并通知給其它客戶端
? 4、其它客戶端接收到通知,請求Server端獲取最新配置
? 5、全部客戶端均獲取到最新的配置
安裝RabbitMQ
因為我們需要用到消息隊列,我們這里選擇RabbitMQ,使用Docker進行安裝。
拉取鏡像
執行以下命令,拉取鏡像。
docker pull rabbitmq:management
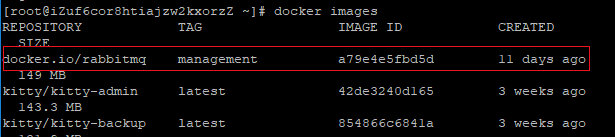
完成之后執行以下命令查看下載鏡像。
docker images
創建容器
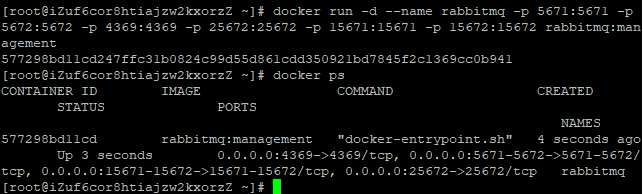
執行以下命令,創建docker容器。
docker run -d --name rabbitmq -p 5671:5671 -p 5672:5672 -p 4369:4369 -p 25672:25672 -p 15671:15671 -p 15672:15672 rabbitmq:management
啟動成功之后,可以執行以下命令查看啟動容器。
docker ps
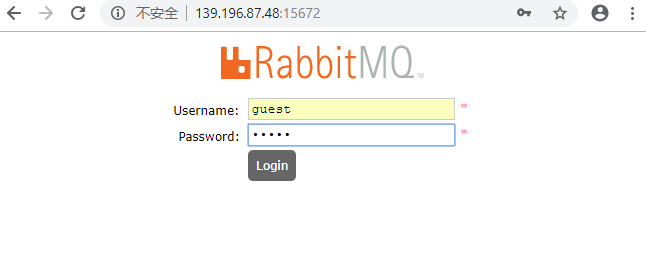
登錄界面
容器啟動之后就可以訪問web管理界面了,訪問 http://宿主機IP:15672。
系統提供了默認賬號。 用戶名:guest? 密碼:?guest
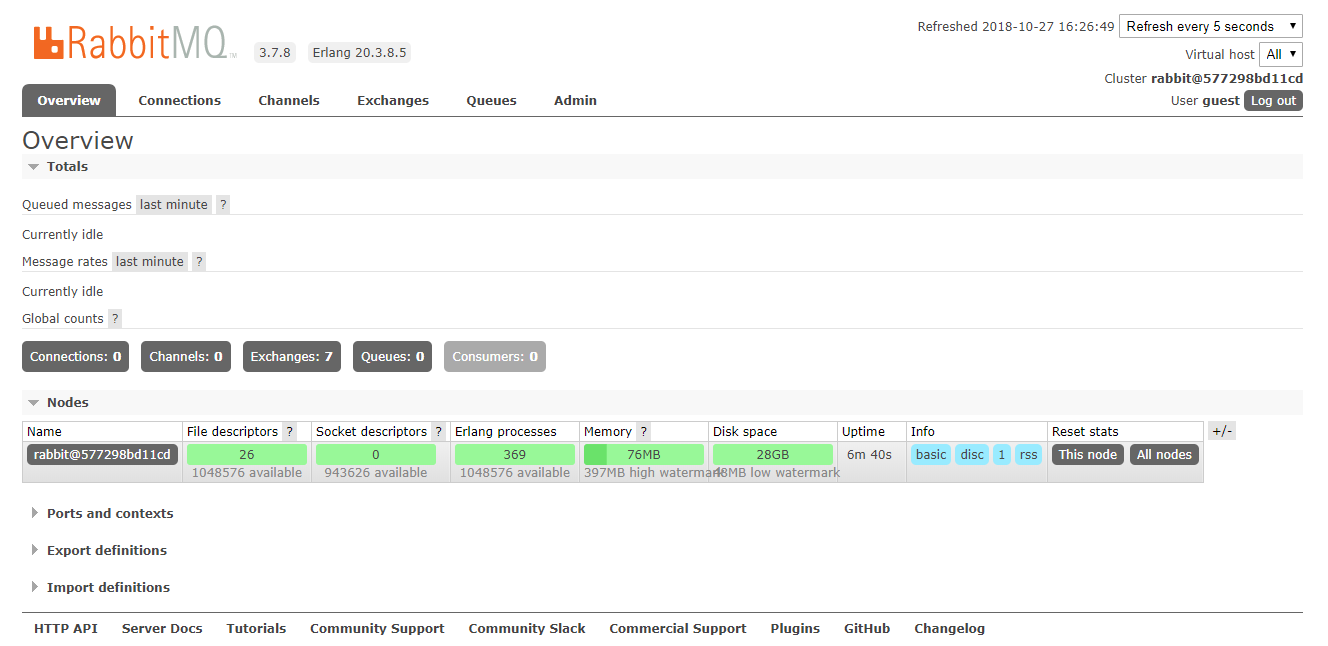
管理界面
客戶端實現
添加依賴
打開客戶端 kitty-consumer,添加消息總線相關依賴。
pom.xml
<!-- bus-amqp -->
<dependency><groupId>org.springframework.cloud</groupId><artifactId>spring-cloud-starter-bus-amqp</artifactId>
</dependency>
修改配置
修改配置,添加RebbitMq的相關配置,這樣客戶端代碼就改造完成了。
bootstrap.yml
spring:cloud:consul:host: localhostport: 8500discovery:serviceName: ${spring.application.name} # 注冊到consul的服務名稱config:discovery:enabled: true # 開啟服務發現serviceId: kitty-config # 配置中心服務名稱name: kitty-consumer # 對應{application}部分profile: dev # 對應{profile}部分label: master # 對應git的分支,如果配置中心使用的是本地存儲,則該參數無用rabbitmq:host: localhostport: 5672username: guestpassword: guest 服務端實現
添加依賴
修改?kitty-conifg,添加相關依賴。
pom.xml
<dependency><groupId>org.springframework.boot</groupId><artifactId>spring-boot-starter-actuator</artifactId>
</dependency>
<dependency><groupId>org.springframework.cloud</groupId><artifactId>spring-cloud-starter-bus-amqp</artifactId>
</dependency>
修改配置,添加RabbitMq的和接口開放相關配置,這樣服務端代碼也改造完成了。
application.yml?
server:port: 8020
spring:application:name: kitty-configcloud:consul:host: localhostport: 8500discovery:serviceName: ${spring.application.name}    # 注冊到consul的服務名稱config:label: master  # git倉庫分支server:git:uri: https://gitee.com/liuge1988/kitty.git  # 配置git倉庫的地址search-paths: config-repo  # git倉庫地址下的相對地址,可以配置多個,用,分割。username: username  # git倉庫的賬號password: password  # git倉庫的密碼rabbitmq:host: localhostport: 5672username: guestpassword: guest
management:endpoints:web:exposure:include: "*"
測試效果
1.啟動服務端,成功集成消息總線后,啟動信息中可以看到如下圖中的信息。

2.啟動客戶端,發現居然報錯了,網上也找不到相關資料,也沒見其他人提過相關問題。猜測是網上教程多是使用Euraka,而這里用的時Consul,瞎鼓搗了好久,反正是不想換回Euraka,2.0停止開發消息出來以后,將來還不定什么情況,只能硬著頭皮解決了。
org.springframework.beans.factory.NoSuchBeanDefinitionException: No bean named 'configServerRetryInterceptor' availableat org.springframework.beans.factory.support.DefaultListableBeanFactory.getBeanDefinition(DefaultListableBeanFactory.java:685) ~[spring-beans-5.0.8.RELEASE.jar:5.0.8.RELEASE]at org.springframework.beans.factory.support.AbstractBeanFactory.getMergedLocalBeanDefinition(AbstractBeanFactory.java:1210) ~[spring-beans-5.0.8.RELEASE.jar:5.0.8.RELEASE]at org.springframework.beans.factory.support.AbstractBeanFactory.doGetBean(AbstractBeanFactory.java:291) ~[spring-beans-5.0.8.RELEASE.jar:5.0.8.RELEASE]at org.springframework.beans.factory.support.AbstractBeanFactory.getBean(AbstractBeanFactory.java:204) ~[spring-beans-5.0.8.RELEASE.jar:5.0.8.RELEASE]at org.springframework.retry.annotation.AnnotationAwareRetryOperationsInterceptor.getDelegate(AnnotationAwareRetryOperationsInterceptor.java:180) ~[spring-retry-1.2.2.RELEASE.jar:na]at org.springframework.retry.annotation.AnnotationAwareRetryOperationsInterceptor.invoke(AnnotationAwareRetryOperationsInterceptor.java:151) ~[spring-retry-1.2.2.RELEASE.jar:na]at org.springframework.aop.framework.ReflectiveMethodInvocation.proceed(ReflectiveMethodInvocation.java:185) ~[spring-aop-5.0.8.RELEASE.jar:5.0.8.RELEASE]at org.springframework.aop.framework.CglibAopProxy$DynamicAdvisedInterceptor.intercept(CglibAopProxy.java:688) ~[spring-aop-5.0.8.RELEASE.jar:5.0.8.RELEASE]at org.springframework.cloud.config.client.ConfigServerInstanceProvider$$EnhancerBySpringCGLIB$$dd44720b.getConfigServerInstances(<generated>) ~[spring-cloud-config-client-2.0.0.RELEASE.jar:2.0.0.RELEASE]at org.springframework.cloud.config.client.DiscoveryClientConfigServiceBootstrapConfiguration.refresh(DiscoveryClientConfigServiceBootstrapConfiguration.java:84) [spring-cloud-config-client-2.0.0.RELEASE.jar:2.0.0.RELEASE]at org.springframework.cloud.config.client.DiscoveryClientConfigServiceBootstrapConfiguration.startup(DiscoveryClientConfigServiceBootstrapConfiguration.java:69) [spring-cloud-config-client-2.0.0.RELEASE.jar:2.0.0.RELEASE]at sun.reflect.NativeMethodAccessorImpl.invoke0(Native Method) ~[na:1.8.0_131]at sun.reflect.NativeMethodAccessorImpl.invoke(NativeMethodAccessorImpl.java:62) ~[na:1.8.0_131]at sun.reflect.DelegatingMethodAccessorImpl.invoke(DelegatingMethodAccessorImpl.java:43) ~[na:1.8.0_131]at java.lang.reflect.Method.invoke(Method.java:498) ~[na:1.8.0_131]
然后就跟蹤代碼,發現是在下圖中的位置找不到相應的Bean,那么答案就比較明顯了,要么是程序有BUG,不過可能性不大,那應該是就是缺包了,在缺失的包里有這個Bean。但是這個Bean是在哪個包?排查了半天也沒找到,網上也沒有想過資料,對比了一下網上消息總線的配置,依賴也沒有少加什么。

沒有辦法,最后只能自己上手了,不就是在刷新的時候缺少一個攔截器嗎,自己給他弄一個試試唄。
使用就加了一個配置類,并在resources下新建了META-INF目錄和一個spring。factories文件。
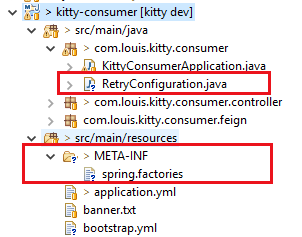
RetryConfiguration.java
package com.louis.kitty.consumer;import org.springframework.boot.autoconfigure.condition.ConditionalOnMissingBean;
import org.springframework.context.annotation.Bean;
import org.springframework.retry.interceptor.RetryInterceptorBuilder;
import org.springframework.retry.interceptor.RetryOperationsInterceptor;public class RetryConfiguration {@Bean@ConditionalOnMissingBean(name = "configServerRetryInterceptor")public RetryOperationsInterceptor configServerRetryInterceptor() {return RetryInterceptorBuilder.stateless().backOffOptions(1000, 1.2, 5000).maxAttempts(10).build();}
}
spring.factories
org.springframework.cloud.bootstrap.BootstrapConfiguration=com.louis.kitty.consumer.RetryConfiguration
在這里指定新建的攔截器,這樣系統初始化時會加載這個Bean。
然后重啟啟動,果然沒有報錯了,還是先別高興,看看能不能用先。
4.先訪問一下?http://localhost:8005/hello,效果如下圖所示。
?
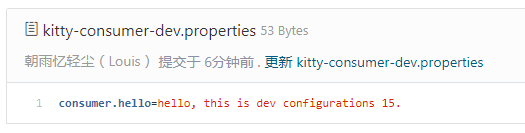
5.修改倉庫配置文件,把數字5改成15,修改完成提交。
?
再次訪問發現還是舊信息。
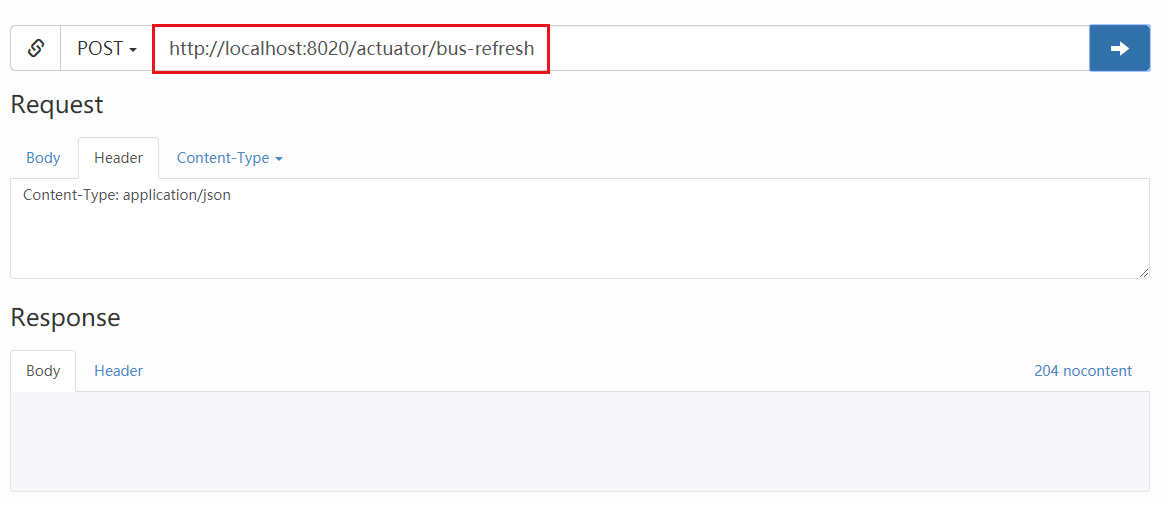
6.再用工具發送post請求?http://localhost:8020/actuator/bus-refresh?。
注意這次是向注冊中心服務端發送請求,發送成功之后服務端會通過消息總線通知所有的客戶端進行刷新。
另外開啟消息總線后的請求地址是?/actuator/bus-refresh,不再是refresh了。
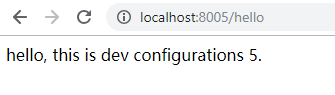
7.給服務端發送刷新請求之后,再次訪問?http://localhost:8005/hello,結果如下(需要一點刷新時間)。
?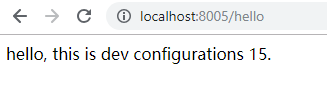
我們愉快的發現客戶端已經能夠通過消息總線獲取最新配置了。