首先將模板文件導入resources/templates,配置MyMvcConfig
@Configurationpublic?class?MyMvcConfig?implements?WebMvcConfigurer?{// 無邏輯視圖跳轉 @Override public void addViewControllers(ViewControllerRegistry registry) { registry.addViewController("/").setViewName("index");????????registry.addViewController("/index.html").setViewName("index");????}}通過在繼承了WebMvcConfigurer接口的MyMvcConfig類中注冊bean或重寫方法,來自定義SpringBoot底層默認的代碼
此時啟動ConfigApplication主類,在地址欄輸入"localhost:8080/"或"localhost:8080/index.html",無邏輯跳轉到index,addViewControllers方法的好處是實現起來比寫一個Controller類簡單,但只能實現無邏輯跳轉
現在瀏覽器頁面中沒有配置的css樣式和img,在html標簽中加入如下配置
xmlns:th="http://www.thymeleaf.org"bootstrap登錄、Spring官方支持的服務的渲染模板中,并不包含jsp。而是Thymeleaf等,而Thymeleaf與SpringMVC的視圖技術,及SpringBoot的自動化配置集成非常完美,幾乎沒有任何成本,只用關注Thymeleaf的語法即可。也就是說jsp已經被SpringBoot官方淘汰。
<link th:href="@{/css/bootstrap.min.css}" rel="stylesheet"><link th:href="@{/css/signin.css}" rel="stylesheet">Thymeleaf語言非常簡單,只需在html標簽前加 "th:" ,后邊類似EL表達式,取地址用@{},取值用${},導入用~{}等等
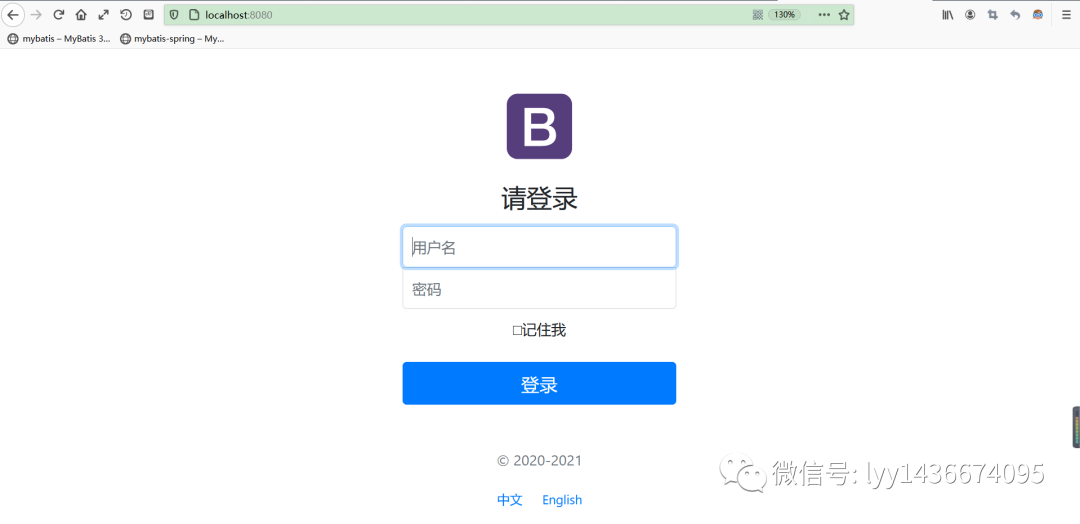
這樣配置后,html頁面中的css樣式終于顯示了出來
i18n頁面國際化:
bootstrap-server?Springboot底層默認實現了國際化,先來看一下官方國際化是怎樣配置的:
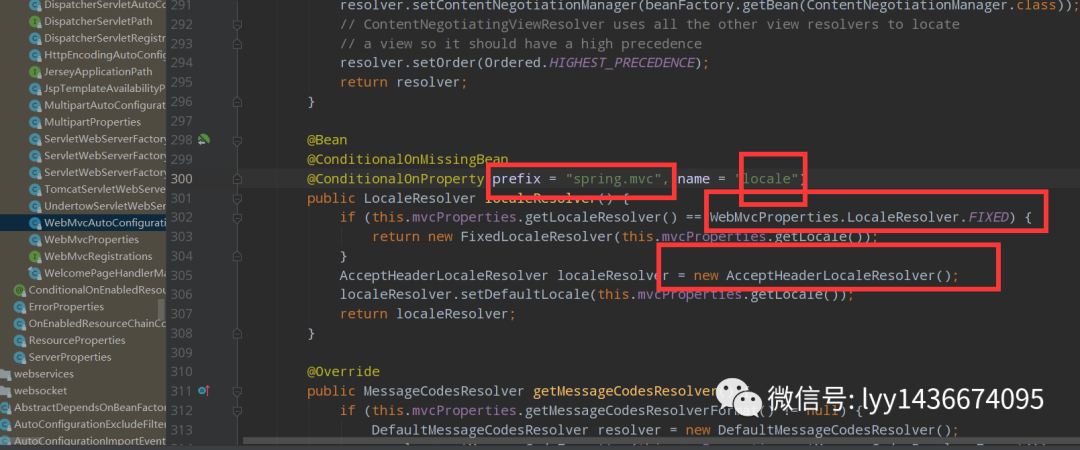
進入AcceptHeaderLocaleResolver
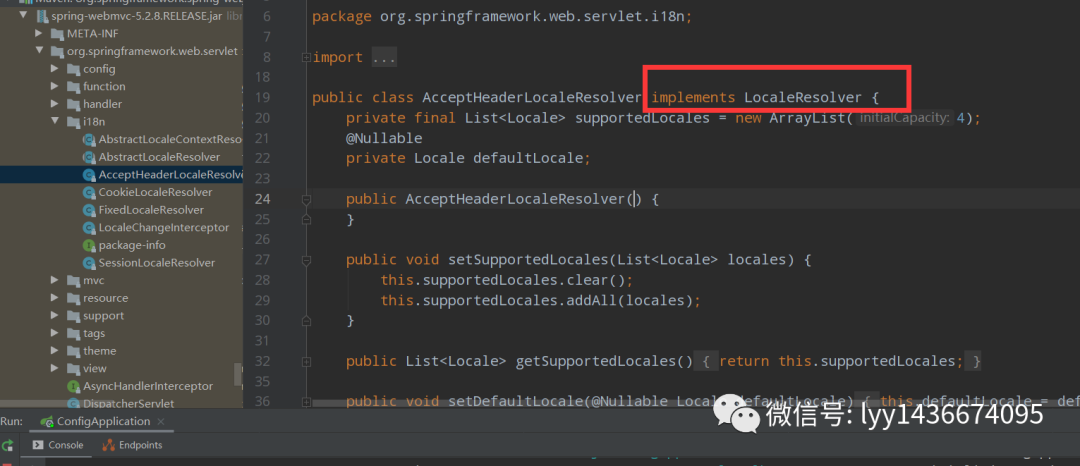
可以看到這個類繼承了LoclaResolver接口,所有我們自定義國際化配置時的類也模仿官方來做
public Locale resolveLocale(HttpServletRequest request) { Locale defaultLocale = this.getDefaultLocale(); if (defaultLocale != null && request.getHeader("Accept-Language") == null) { return defaultLocale; } else { Locale requestLocale = request.getLocale(); List supportedLocales = this.getSupportedLocales(); if (!supportedLocales.isEmpty() && !supportedLocales.contains(requestLocale)) { Locale supportedLocale = this.findSupportedLocale(request, supportedLocales); if (supportedLocale != null) { return supportedLocale; } else { return defaultLocale != null ? defaultLocale : requestLocale; } } else { return requestLocale; } } }網頁攔截、這是官方的國際化核心方法,可以看出官方是通過將Locale存入request的頭文件配置中,再在此方法中取出,如果locale為空,則使用默認國際化,若不為空則new一個與傳入值對應的locale,雖然官方給我們實現了,但是從頭文件里取出參數難免對我門不友好,操作復雜,所以我們可以自定義一個國際化配置器
首先,將index中轉換的標簽修改
class= class=我們直接將參數寫在url里,這樣取出會很方便,zh_CN即為簡體中文,依此類推,接著要新建默認配置文件,簡體中文配置文件和英文配置文件
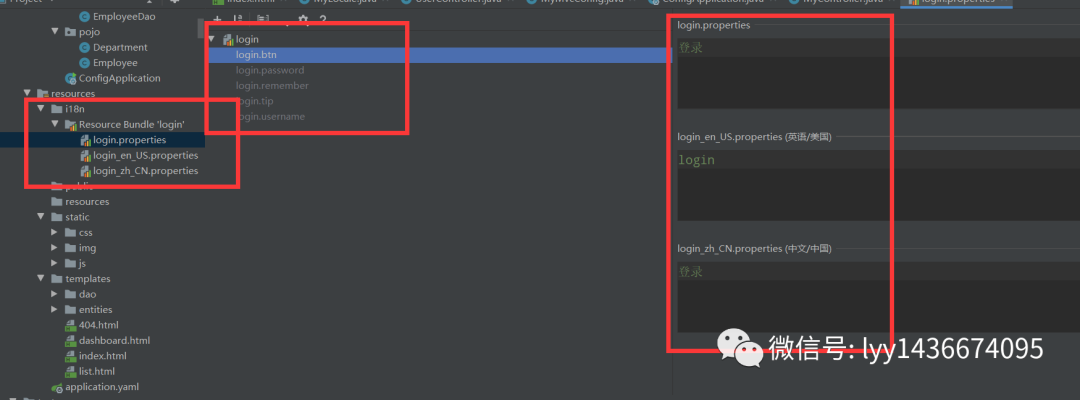
idea提供了編寫國際化配置的可視化界面,為每個要國際化的文本位置都寫配置
public class MyLocale implements LocaleResolver { @Override public Locale resolveLocale(HttpServletRequest httpServletRequest) { //獲取默認Locale Locale locale = Locale.getDefault();????????//獲取url中的language參數 String language=httpServletRequest.getParameter("language"); if(!StringUtils.isEmpty(language)){????????????//若不為空則用_分割,再拼接 String[] strings = language.split("_"); System.out.println(language); locale = new Locale(strings[0], strings[1]); } return locale; } @Override????public?void?setLocale(HttpServletRequest?httpServletRequest,?HttpServletResponse?httpServletResponse,?Locale?locale)?{ }}bootstrap5、MyLocale類就繼承LocaleResolver接口,實現它的全部方法,只對resolveLocale重寫
再MyMvcConfig中注冊bean
// 注冊LocaleResolver國際化 @Bean public LocaleResolver localeResolver(){ return new MyLocale(); }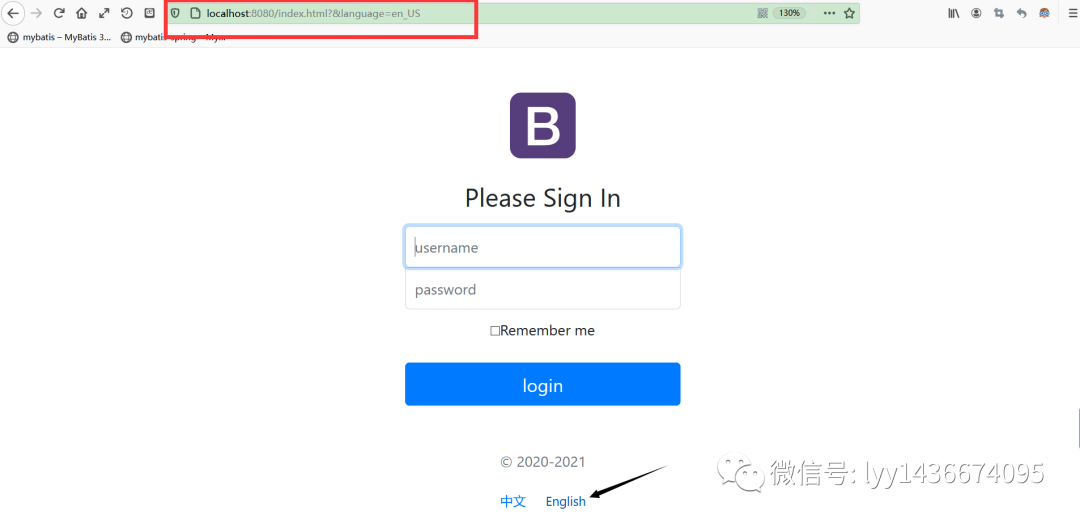
國際化完成
登錄功能實現:
頁面已攔截、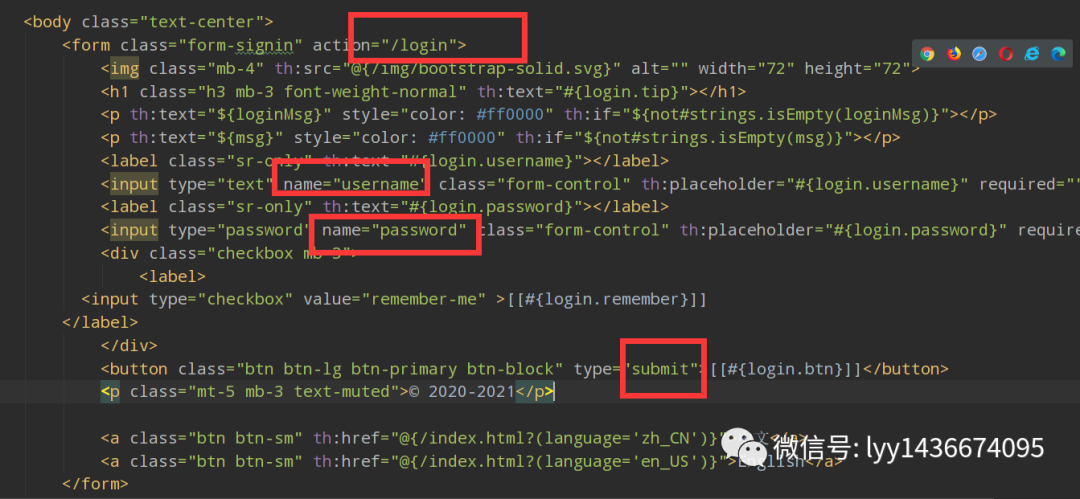
form表單提交到/login請求中,編寫Controller類
@RequestMapping("/login") public String login(Model model, @RequestParam("username") String username, @RequestParam("password") String password, HttpSession httpSession){ if(!StringUtils.isEmpty(username) & "123".equals(password)){ return "redirect:/main.html"; } httpSession.setAttribute("loginUser",username); model.addAttribute("msg","用戶名或密碼錯誤"); return "index"; }若username不為空且password等于123,重定向到main.html請求中,反之則在session和model中都加入錯誤信息后返回到index主頁
配置攔截器,防止用戶自行在地址欄輸入main.html直接進入后臺
//攔截器public class LoginInterceptor implements HandlerInterceptor { @Override public boolean preHandle(HttpServletRequest request, HttpServletResponse response, Object handler) throws Exception { String msg = (String)request.getSession().getAttribute("loginUser"); if(msg==null){ //未登錄 request.setAttribute("loginMsg","請先登錄");// response.sendRedirect("/index.html"); request.getRequestDispatcher("/index.html").forward(request,response); return false; }else { return true; } }}若未登錄則跳轉到登陸頁面,并阻止放行,若已登錄則放行
Spring boot,注冊攔截器
// 注冊攔截器@Overridepublic void addInterceptors(InterceptorRegistry registry) { registry.addInterceptor(new LoginInterceptor()).addPathPatterns("/main.html");}只攔截/main.html請求
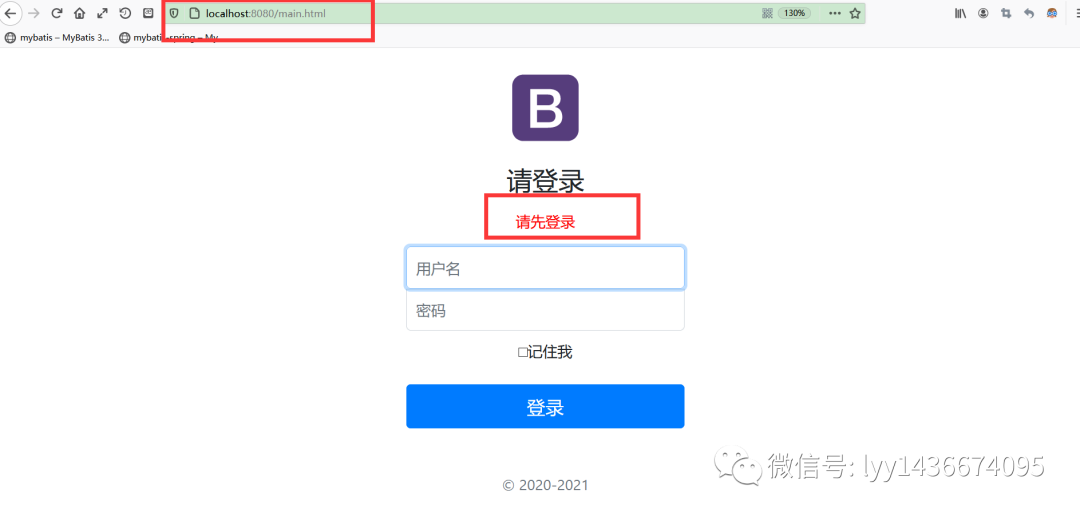
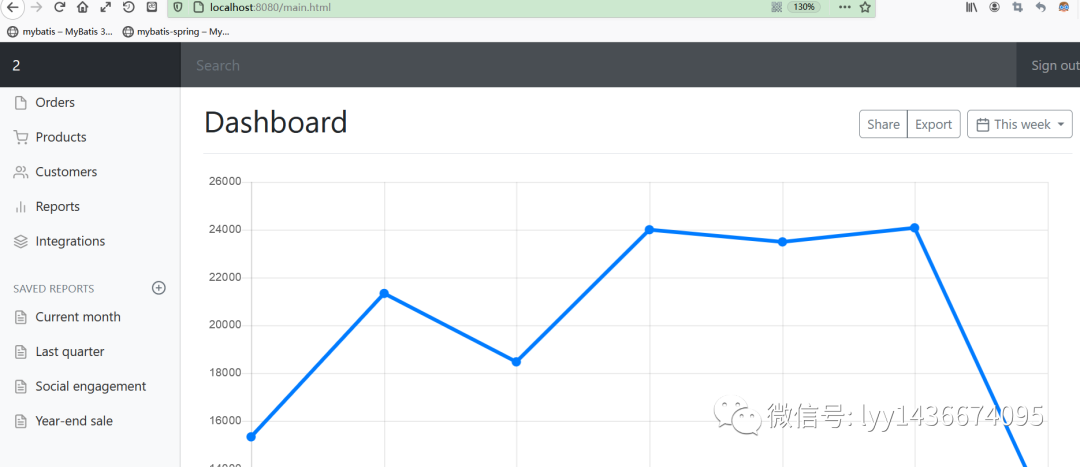
用戶輸入/main.html請求時若未登錄會攔截,已登錄會直接進入后臺
頁面被攔截怎么取消,用戶注銷實現:
@RequestMapping("/del") public String del(HttpSession httpSession){ httpSession.removeAttribute("loginUser"); return "index";????}class="nav-link" th:href="@{/del}">Sign out展示全部成員信息:用Thymeleaf-each循環實現
@Controllerpublic?class?UserController?{ @Autowired????private?EmployeeDao?employeeDao; @RequestMapping("/Users")????public?String?Users(Model?model){ Collection employeeAll = employeeDao.getEmployeeAll(); model.addAttribute("users",employeeAll); return "/list";????}}@Repositorypublic class EmployeeDao { public static Map employMap=null; @Autowired????public?DepartmentDao?departmentDao; static { employMap = new HashMap<>(); employMap.put(101,new Employee(1001,"張三","123@qq.com",1,new Department(101,"吃飯部"))); employMap.put(102,new Employee(1002,"李四","122@qq.com",1,new Department(102,"學習部"))); employMap.put(103,new Employee(1003,"張四","123@qq.com",0,new Department(103,"睡覺部"))); employMap.put(104,new Employee(1004,"李三","121@qq.com",1,new Department(104,"王者部"))); employMap.put(105,new Employee(1005,"李張三","223@qq.com",0,new Department(105,"吃屎部")));????} //查詢全部員工信息 public CollectiongetEmployeeAll(){ return employMap.values();????}}@Data@NoArgsConstructorpublic class Employee { private Integer id; private String lastName; private String email; private Integer gender; private Department department;????private?Date?birth; public Employee(Integer id, String lastName, String email, Integer gender, Department department) { this.id = id; this.lastName = lastName; this.email = email; this.gender = gender; this.department = department; this.birth = new Date(); }} <tbody> <tr th:each="user,Employee:${users}" > <th th:text="${user.id}">th> <th th:text="${user.lastName}">th> <th th:text="${user.email}">th> <th th:text="${user.gender}">th> <th th:text="${user.department}">th> tr> tbody>
功能實現
版权声明:本站所有资料均为网友推荐收集整理而来,仅供学习和研究交流使用。

工作时间:8:00-18:00
客服电话
电子邮件
admin@qq.com
扫码二维码
获取最新动态