azure創建centos
Power BI is an extremely powerful tool to create dashboards and reports. In the last article, we learned how to create a Data Warehouse in Azure. In this new chapter, we will learn how to create reports from the Data Warehouse in Azure using Power BI in Azure.
Power BI是創建儀表板和報告的功能非常強大的工具。 在上一篇文章中,我們學習了如何在Azure中創建數據倉庫 。 在這一新的章節中,我們將學習如何使用Azure中的Power BI從Azure的數據倉庫中創建報表。
With Power BI, you have your information in real time, it is easy to learn and use. In Azure, you do not need to install anything!
借助Power BI,您可以實時獲取信息,易于學習和使用。 在Azure中,您無需安裝任何內容!
centos怎么創建文件。 In this article, I will show you how to create charts, work with maps and show some limitations of the tool.
在本文中,我將向您展示如何創建圖表,如何使用地圖以及如何使用該工具。
Open the Azure Portal and go to the SQL Database:
打開Azure門戶并轉到SQL數據庫:
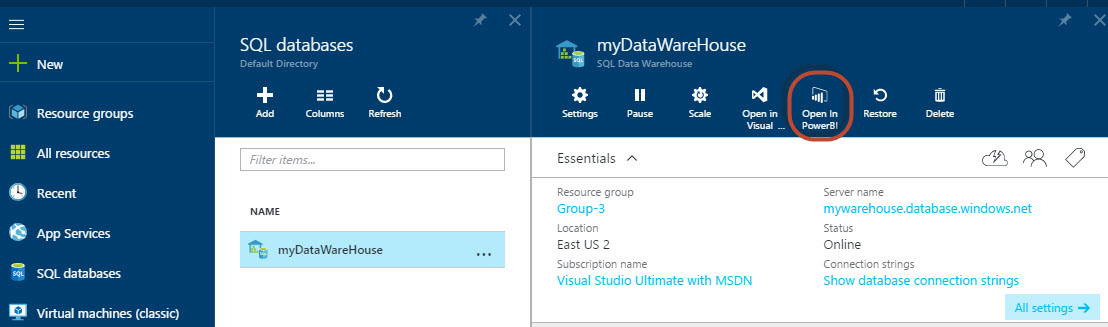
Select your SQL Data Warehouse created in earlier chapters and press “Open” in Power BI icon:
選擇您在前面章節中創建SQL數據倉庫,然后在Power BI圖標中按“打開”:
centos6創建用戶,
If it is your first time using Power BI, you may need to specify your credentials. Otherwise, login with your credential:
如果是第一次使用Power BI,則可能需要指定憑據。 否則,使用您的憑證登錄:
centos創建組、 The system will show the Server name and the Database name. You can optionally enable the advanced option to specify the frequency to refresh the data (by default 15, which is the minimum value). Just press “Next”, unless you want to change the advanced options:
系統將顯示服務器名稱和數據庫名稱。 您可以選擇啟用高級選項以指定刷新數據的頻率(默認為15,這是最小值)。 只需按“下一步”,除非您想更改高級選項:
You will need to specify the username and password to connect to the Database:
您將需要指定用戶名和密碼才能連接到數據庫:
centos7創建目錄,
You will have the following image created. Double click on it:
您將創建以下圖像。 雙擊它:
azure docker, You are now in Power BI! You can create the report now.
您現在在Power BI中! 您可以立即創建報告。
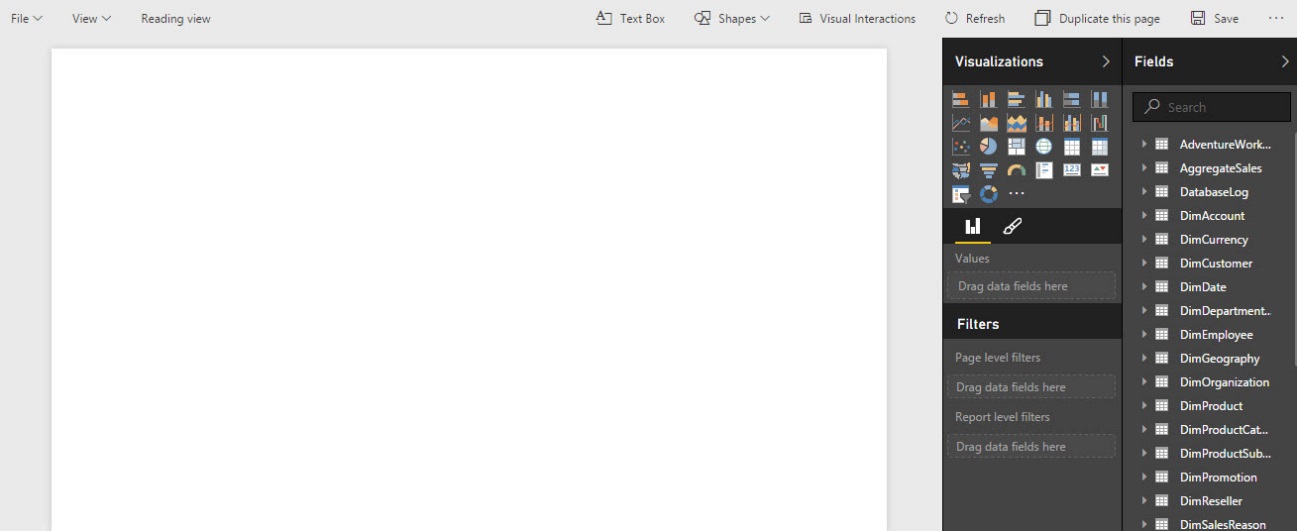
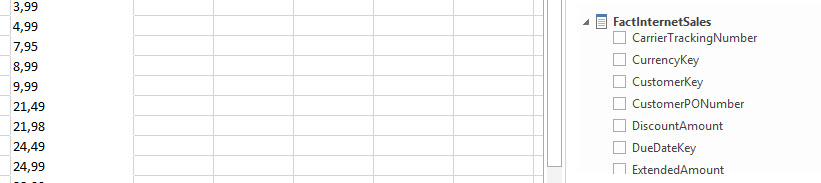
Check the “FactInternetSales” in the “Fields” section:
創建centos。 檢查“字段”部分中的“ FactInternetSales”:
Select the “SalesAmount” field:
選擇“ SalesAmount”字段:
centos8 docker。
In the legend, select the “Currency key”:
在圖例中,選擇“貨幣密鑰”:
The graph created is the following:
azure開發? 創建的圖形如下:
You can easily change the bars to pies using the visualization option:
您可以使用可視化選項輕松將條形更改為餅形:
centos8,
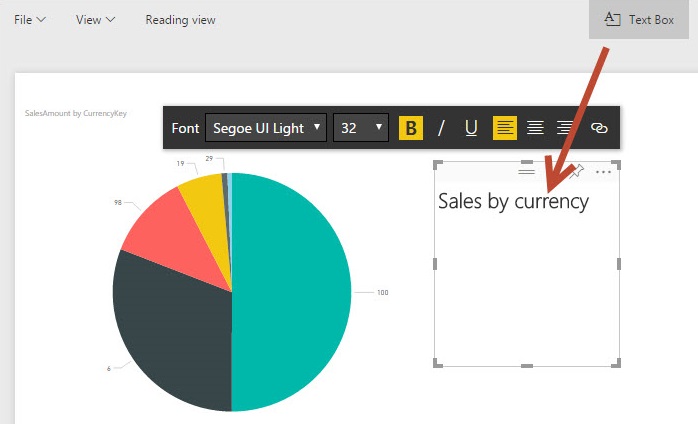
You can add text boxes to your chart and add text by customizing the font, size, alignment:
您可以在圖表中添加文本框,并通過自定義字體,大小,對齊方式來添加文本:
Microsoft azure。 You have a button to analyze your information in Excel. This option is in the preview version. For this option, you will need to install the SQL_AS_OLEDB installer, which will be downloaded from the Azure Portal. The installer is a new version of the connector included in SQL 2016:
您有一個按鈕可以在Excel中分析您的信息。 此選項在預覽版本中。 對于此選項,您將需要安裝SQL_AS_OLEDB安裝程序,該安裝程序將從Azure門戶下載。 安裝程序是SQL 2016中包含的連接器的新版本:
This new provider allows connecting to Power BI from Microsoft Excel. When you try to access, you will the the odc file. This file contains the connection information. The installer has 28 MB approx:
此新提供程序允許從Microsoft Excel連接到Power BI。 嘗試訪問時,將顯示odc文件。 該文件包含連接信息。 安裝程序大約有28 MB:
centos創建新用戶。
To open the connection in Excel, in the menu go to “DATA”. Select the “Get External Data” and select “Existing Connections”. Then you will select the odc file:
要在Excel中打開連接,請在菜單中轉到“數據”。 選擇“獲取外部數據”,然后選擇“現有連接”。 然后,您將選擇odc文件:
azure架構? Your Power BI credentials will be required. You will be connected to Excel. You will be able to handle the Azure Data in Excel like any dynamic table:
您的Power BI憑據將是必需的。 您將連接到Excel。 您將能夠像處理任何動態表一樣在Excel中處理Azure數據:
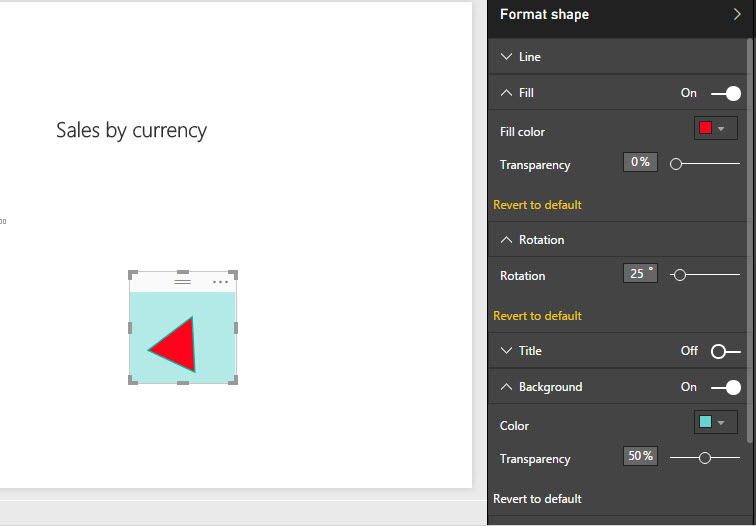
In Power BI, you can also add Shapes to your charts, like rectangles, ovals, lines and arrows:
azure 虛擬機? 在Power BI中,您還可以將圖形添加到圖表中,例如矩形,橢圓形,直線和箭頭:
The format shape allows you to change the color, transparency, rotation, background, titles and other shape properties:
格式形狀允許您更改顏色,透明度,旋轉度,背景,標題和其他形狀屬性:
centos創建一個文件。
You can “Save” or “Save As” your report and create similar reports with some modifications:
您可以“保存”或“另存為”報告,并進行一些修改后創建類似的報告:
centos創建目錄的命令。 In the menu, you can find the dashboards, reports, and datasets:
在菜單中,您可以找到儀表板,報告和數據集:
When you click the “Save as” button, the report will be created in the report section:
當您單擊“另存為”按鈕時,將在報告部分中創建報告:
centos怎么創建用戶、
By default, when you select a report, it is in a read-only mode. You’ll need to press the “Edit report” option to edit the report:
默認情況下,當您選擇報告時,它處于只讀模式。 您需要按“編輯報告”選項來編輯報告:
azure portal、 Another cool feature is the Map. In the “Fields” section, go to the “DimGeography” dimension and select the “City” field:
另一個很酷的功能是地圖。 在“字段”部分中,轉到“ DimGeography”維度,然后選擇“城市”字段:
A map is displayed and it shows all the cities from the dimension:
將顯示一個地圖,并顯示該維度中的所有城市:
centos創建用戶和組,
Using the mouse wheel, you can Zoom in and Zoom out the map. You can see the names of the streets:
使用鼠標滾輪,可以放大和縮小地圖。 您可以看到街道名稱:
In the a new report, create a chart of the “FactInternetSales” table of the “SalesAmount” field (as we did in step 9):
在一個新的報告中,在“ SalesAmount”字段的“ FactInternetSales”表中創建一個圖表(與在步驟9中所做的一樣):
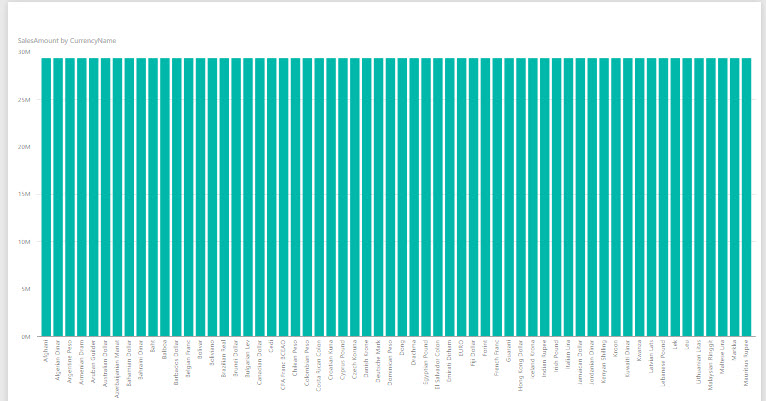
Now, I am going to try to get the chart of sales amount per currency name. In the “DimCurrency” table, select the “CurrencyName” field.
現在,我將嘗試獲取每個貨幣名稱的銷售額圖表。 在“ DimCurrency”表中,選擇“ CurrencyName”字段。
If you check the graph of the “SalesAmount” per currency name, you will notice that all the values are the same for each currency. This is because Power BI cannot detect the relationships between the Fact Table and the dimensions. This is not cool, but you can create views to get this information.
如果檢查每種貨幣名稱的“ SalesAmount”圖,您會注意到每種貨幣的所有值都相同。 這是因為Power BI無法檢測事實表和維度之間的關系。 這不是很酷,但是您可以創建視圖來獲取此信息。
Power BI is a simple an intuitive tool. In Azure, you do not need to worry about the installation. You only need to take care of the information and create nice reports for your company. I hope you will have fun with it as I did.
Power BI是一個簡單而直觀的工具。 在Azure中,您無需擔心安裝。 您只需要照顧好信息并為您的公司創建漂亮的報告即可。 希望您能像我一樣樂在其中。
In this article, we have learned how to create charts, add shapes, add text, and work with maps. We’ve also learned how to export the Power BI information to MS Excel. For Excel, you will need the last OLEDB provider. We’ve also noticed that Power BI cannot detect the relationships between the Fact and Dimension tables. The workaround is to create some views with the information required.
在本文中,我們學習了如何創建圖表,添加形狀,添加文本以及使用地圖。 我們還學習了如何將Power BI信息導出到MS Excel。 對于Excel,您將需要最后的OLEDB提供程序。 我們還注意到Power BI無法檢測Fact表和Dimension表之間的關系。 解決方法是使用所需的信息創建一些視圖。
If you have any questions, please let me know – you may use the comments section below.
如有任何疑問,請告訴我-您可以使用下面的評論部分。
翻譯自: https://www.sqlshack.com/create-azure-data-warehouse-reports-using-azure-power-bi/
azure創建centos
版权声明:本站所有资料均为网友推荐收集整理而来,仅供学习和研究交流使用。

工作时间:8:00-18:00
客服电话
电子邮件
admin@qq.com
扫码二维码
获取最新动态


